What is Azure Devops?
DevOps is not only a tool but also a cultural and professional movement. In my opinion, Devops are practices that provide automation, communication and integration between software teams and IT teams.
In this approach, Azure DevOps comes with 5 main modules. These are ; Boads, Repos, Pipelines, Tests and Artifacts. In fact, none of these modules are work that we haven’t done before, and it’s not a new technology, but the added value of Azure DevOps is that we can manage all project components from a single portal. All project related development steps, kanban board, code repository, automatic CI / CD processes, test steps and nuget packages can be managed through a single portal.
Azure Devops Modules

Azure Boards consists of 5 main components:
1. With Azure Boards, we can follow all the effort and steps of our project. We can follow the classical Agile, Scrum methods or customize it according to our requests.
2. With Repos, we can keep our team’s knowledge base or codes in the same environment as our project. We can host our application as a package with the VSTS feature if we want with the Git feature.
3. Azure Pipelines : Maybe we can say that Pipelines Azure DevOps is the most important feature. With this module, we can set up our CI / CD processes, set up approval mechanisms or run scripts that run automatically.
4. With the test module, we can setup test steps in our application. We can try these from a browser, open a bug detection and create work items based on these bugs.
5. With Arfitacs module, we can distribute the dependency packages used by our application. After the application is compiled, the dependencies used by the most current version are packaged and distributed in nuget or other package management languages.
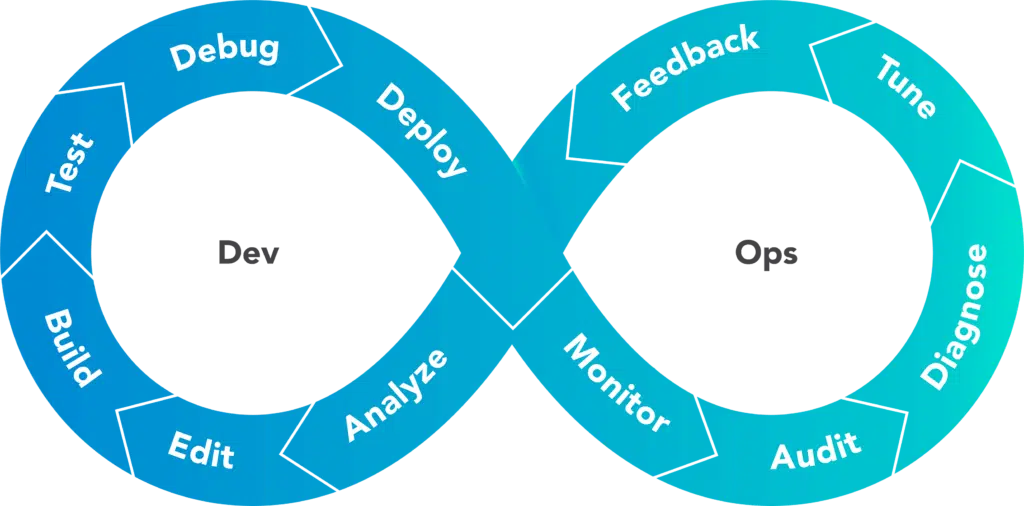
Devops Lifecycle
If we want to develop a project with Azure DevOps, the life cycle of this project will be as above. To explain this image
-
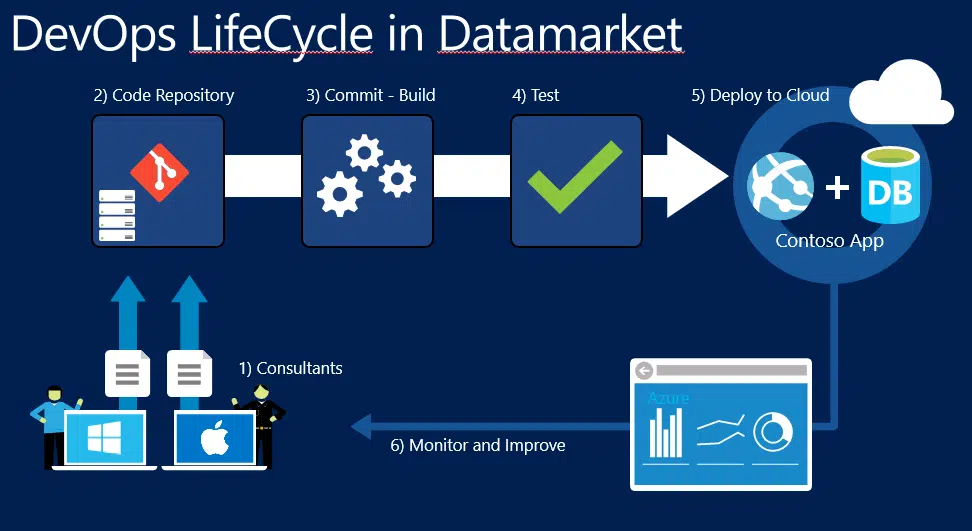
- Consultants & Developers : Development of the application or project is made. Pushed to the repository.
-
- Code Repository : The source codes sent by the developers are versioned and kept in the branch structure. If the development is found appropriate, a pull request is made to the master branch.
-
- Commit-Build : After the application is Pull Request, Build process is performed and the executable file is built.
-
- Test : Automated tests are performed before the executable package is deployed. If all of these tests are successful, move on to the next step.
-
- Deploy to Cloud : Our executable package is loaded into the production environment with the deployment model specified and our new version goes live.
-
- Monitor and Improve : The production environment is monitored and the process is turned back according to the business needs, and related developments are made.
Although the above life cycle shows the repetitive life cycle of DevOps in a very superficial way, it may be possible for different companies or different units to take part in each stage according to each company’s own environment. Even doing the same process with different tools and teams within the same company can often be the case. But the only thing that does not change is that each process runs automatically one after another and the life cycle is systematic, independent of individuals.
Azure Devops Pipeline Sample
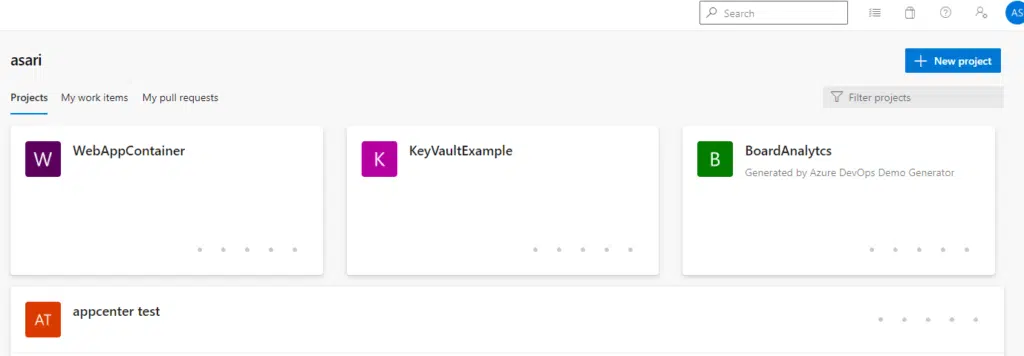
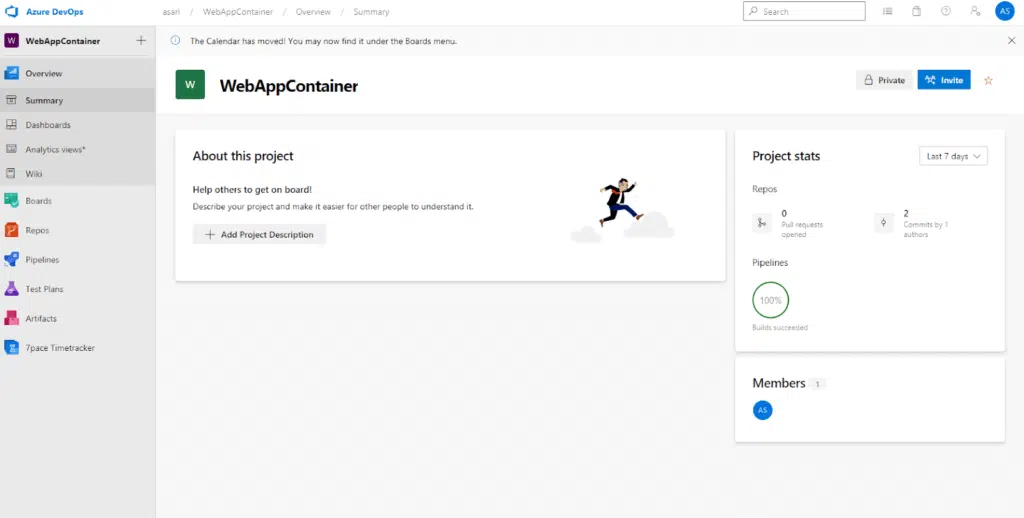
If we want to set up the Azure DevOps service internally or individually. It will be enough to log in to dev.azure.com and create a project. One of the most important thing of this service is that all features up to 5 users are free within the same project and then they offer a free restricted access. Some of the projects in my devops environment are shown in the image below.
We are entering our project called WebApp Container and a welcome screen appears. Here is a general information about our project and a field that we can call wiki..
You also see another module under Artifacts on the left. You can add extensions to your project from Azure DevOps’ marketplace. We will make an example of editing a new pipeline. For this, we publish the codes to our repository first. If we wanted to, we could keep the code not here, but in any git distribution.
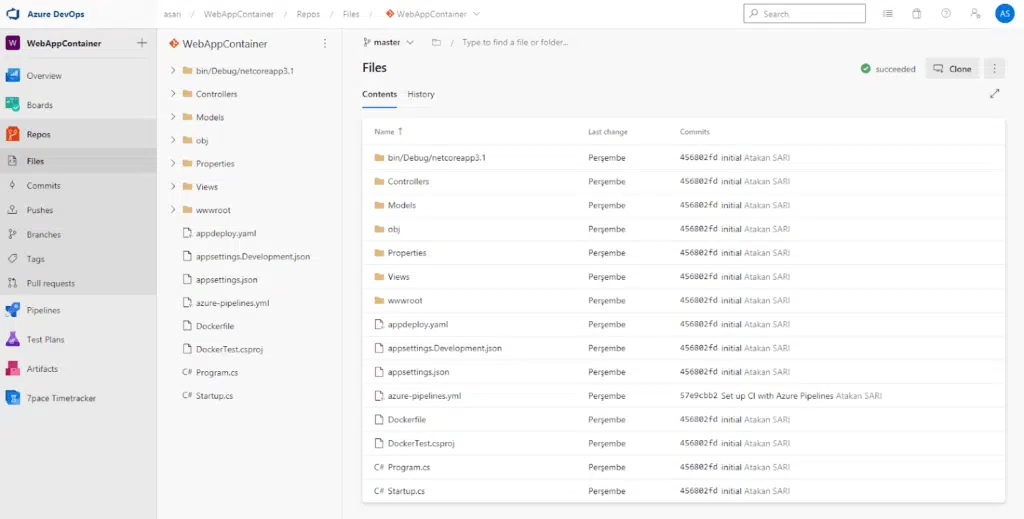
Since our codes are located in our Repository, we first construct the CI pipeline that will work with every code transmission. To do this, we press the New Pipeline button from the Pipelines module.
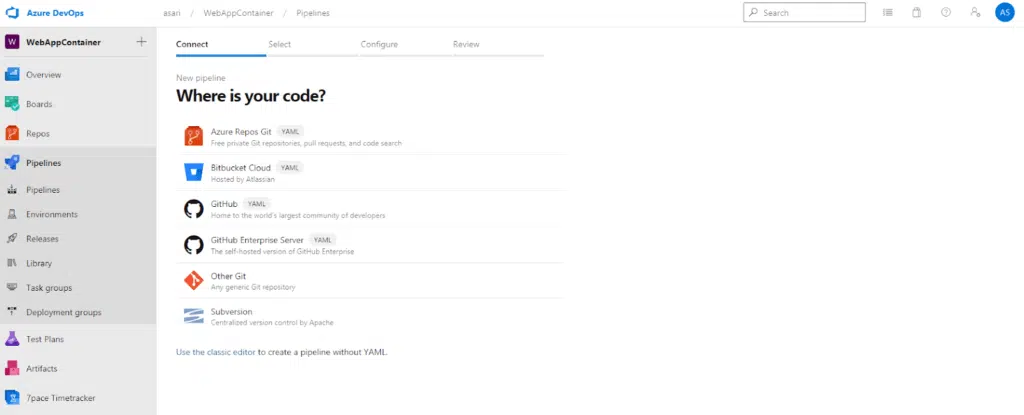
IT wants us to show us where our code is. If we choose one of the above options here, we set up a pipeline in YAML format, if we say classic editor as in the article below, we can build a more visualized pipeline. My advice will be editing in YAML format because the yaml file is committed to the git branch and can be versioned in the repository file in developers regardless of the environment. We continue by choosing our repository. In the next step, it asks which application type to build.
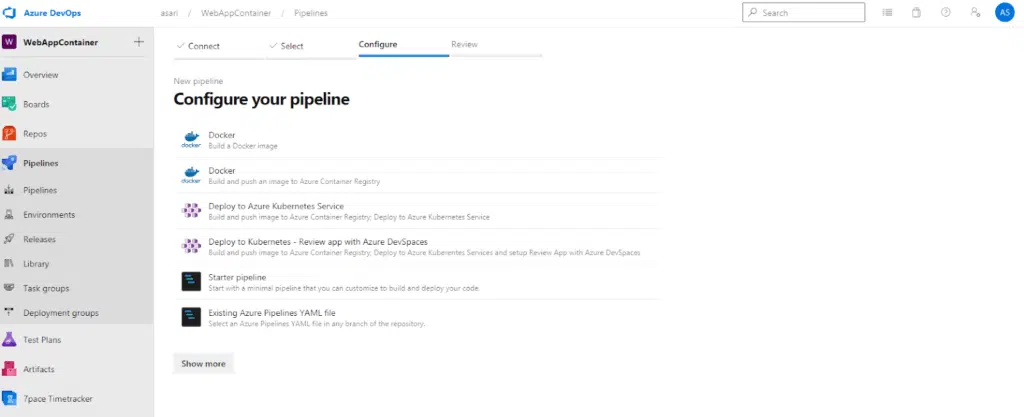
Since it is dockerfile in our files, it has put Docer at the top as suggested. We can continue with the pipeline models that we encounter here by choosing a template and an empty template. However, if we choose Docker, steps will be added automatically to build Docker image.
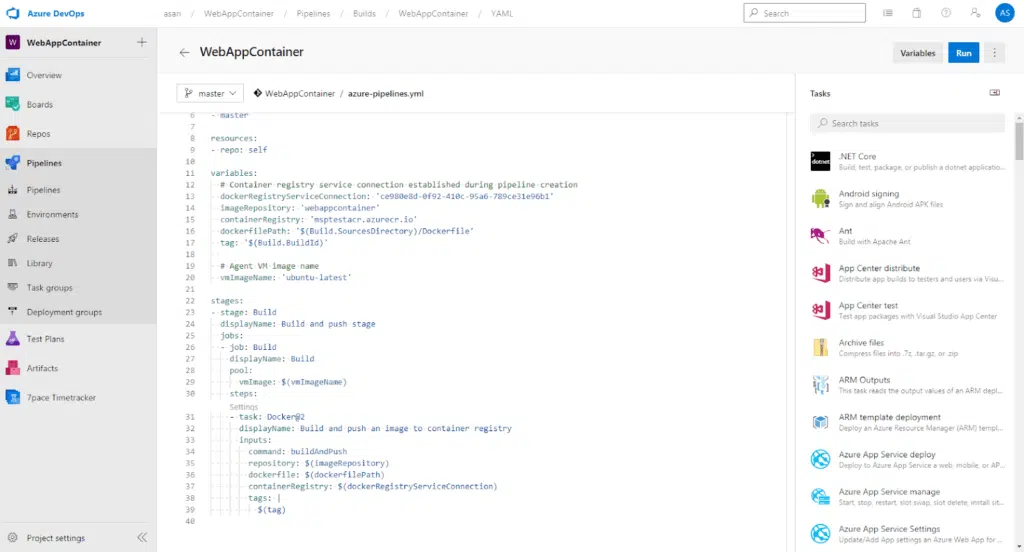
The yaml of our CI pipeline is formed as follows.
This pipeline now consists of a few steps and is doing Docker build and push to ACR. When we run it, we get an output like the one below.
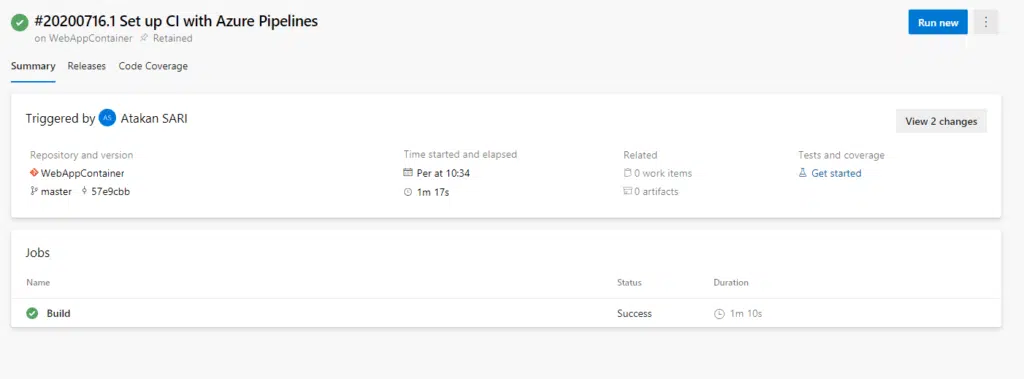
Our pipeline has been completed in 1 minute 10 seconds and our new image has been pushed to Container Registry. In this way, every time the developer commits his code to the master, he will get an application in the new version.